Blogger / 24 July, 2024 / Nanny Anita
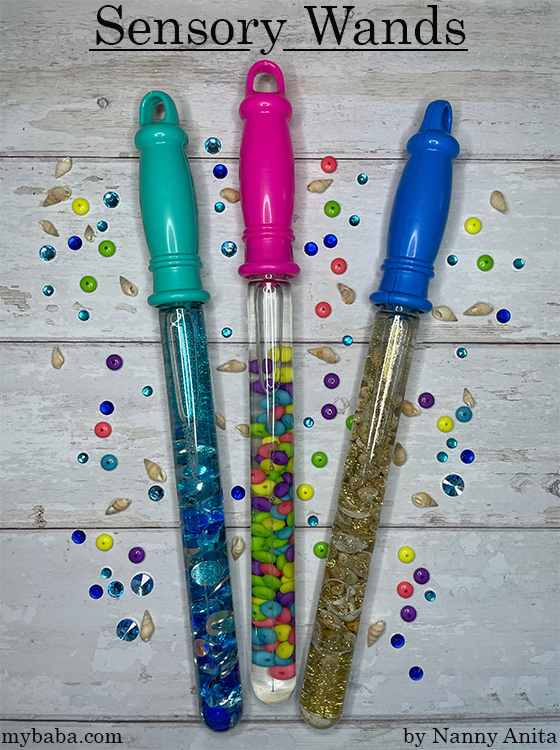
I will soon be starting a new job with a baby, while I have a bit of time to myself, I have been getting some new resources ready to use at work. The first one up is these sensory wands. I am not going to lie; they are really mesmerising.
Make sure you follow my activities for babies on Pinterest for more ideas. Don’t forget to save the pin for later.
When you have finished with your big tube of bubbles give it a quick rinse out to get rid of any soap residue. Alternatively, if you can’t wait to finish the bubbles, you could decant them into a container.
Pull or cut off the bubble wand from the lid.
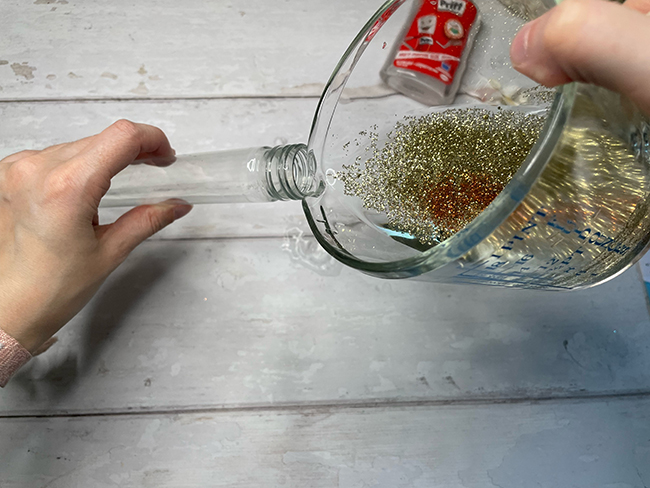
Fill up just over half of the tube with warm water. You want warm water because it helps the glue to dissolve quicker. You need to leave room in the tube to add the glue and items, or it will overflow. Don’t worry, you can always top it up with water at the end if necessary. If you want to add glitter to the mix, I added it to the water and then poured it in. It made less of a mess.
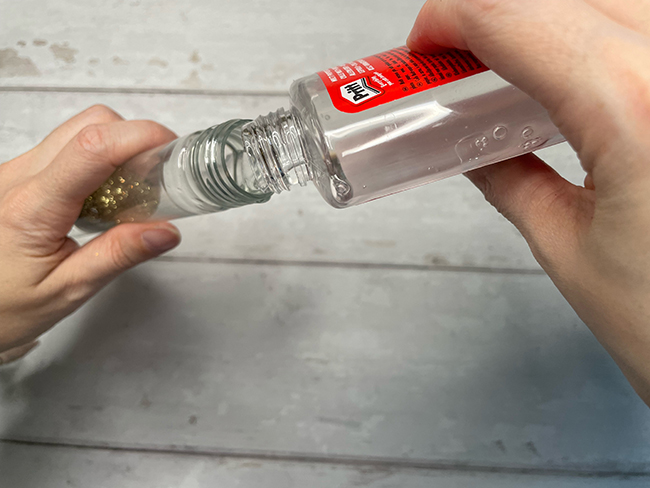
Add some glue or strong hold hair gel. The more you add, the slower the items will fall in the tube when it is turned upside down.
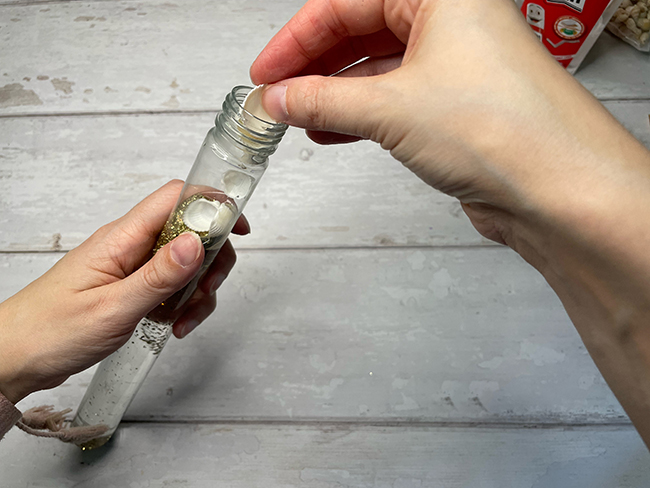
Next add the items that you want. This could be beads, shells, pom poms, bells, sequins, etc.
Before gluing the lid on, make sure that it is completely dry. Add some hot glue or super glue to the lid and secure it onto the tube. I always like to double check that with these sorts of things that the lid is still securely closed every time I use it with babies and small children. They are excellent at being able to undo these sorts of things, and most of the items in these sensory wands could be a chocking hazard.
If you enjoyed these sensory wands, be sure to check out my sensory tubes, oil and water sensory bottles, and sensory board.
Pin for later:

Step into party season with Linzi’s gorgeous collection of occasion-ready footwear. From sparkling heels and statement platforms to elegant courts and chic ballet flats, there’s something for every festive celebration. Whether you’re dressing up for a Christmas party, heading out for cocktails or planning your New Year’s Eve look, Linzi has the finishing touches covered. Think eye-catching details, flattering silhouettes and plenty of sparkle, all at prices that won’t blow the party budget.
Christmas Gifting / 15 November, 2026
Christmas Gifting / 14 November, 2026
Christmas Gifting / 13 November, 2026